Mastering Automation: Powering AWS CodePipeline with GitHub Actions
SHARE THE BLOG
Introduction
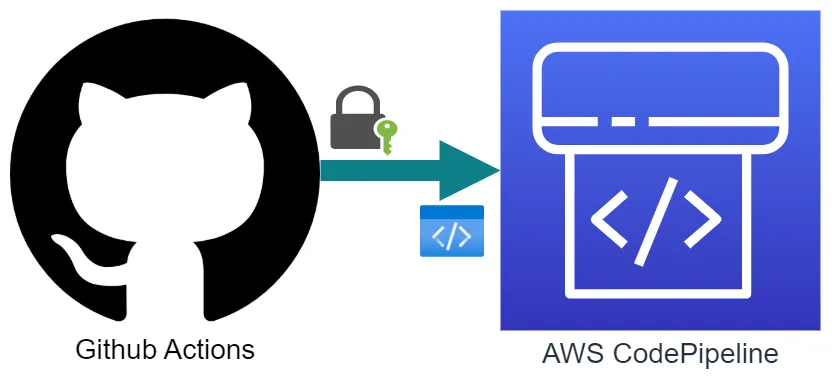
In the dynamic world of software development, Continuous Integration/Continuous Deployment (CI/CD) strategies have emerged as the cornerstone of efficient and error-free coding practices. The unique blend of AWS CodePipeline and GitHub Actions stands out among various CI/CD tools available today. This piece will guide you in setting up a workflow to trigger AWS CodePipeline using GitHub Actions.

Prerequisites
- Basic knowledge of AWS IAM and CodePipeline
- Familiarity with GitHub Actions and YAML syntax.
- An AWS account.
- A GitHub Account and Repository.
Step-by-Step Guide
Step 1: Creating an OpenID Connect Identity Provider in AWS IAM Console
For an enhanced security measure, we’ll use OpenID Connect, enabling our workflows to authenticate with AWS services without resorting to access keys. This method promotes a more secure mechanism for managing AWS connections. The first step on this path requires the creation of an identity provider within the AWS IAM Console.
OpenID Connect Identity Provider details:
					Type of Trusted Entity: Web Identity
Identity Provider: token.actions.githubusercontent.com
Audience: sts.amazonaws.com
Step 2: Building an IAM Role for GitHub Action Jobs
Establish an IAM role that will be used by our GitHub Action workflow tasks to secure a passing access token from AWS. Subsequent AWS-related commands in our workflow will then utilize this access token. A major benefit of this system is that the returned access token is automatically set behind the scenes, thus, manual intervention isn’t required on our part.
Create an IAM role with the below inline policy.
					{
    "Version": "2012-10-17",
    "Statement": [
        {
            "Effect": "Allow",
            "Action": "codepipeline:StartPipelineExecution",
            "Resource": "arn:aws:codepipeline:<REGION>:<ACCOUNT_ID>:*"
        },
        {
            "Effect": "Allow",
            "Action": "iam:PassRole",
            "Resource": "arn:aws:iam::<ACCOUNT_ID>:role/<IAM_Role_NAME>"
        }
    ]
}
Step 3: Configuring Trust Policy into the IAM Role
To allow GitHub Actions to assume the IAM role, append a trust policy. This policy should permit the ‘AssumeRoleWithWebIdentity’ action for a principal authenticated by the OpenID Connect identity provider and should define the GitHub Actions repository to constrain access. Ensure that your IAM role’s trust policy allows the IAM user to ‘AssumeRole’ and ‘TagSession’ as shown below.
					{
    "Version": "2012-10-17",
    "Statement": [
        {
            "Effect": "Allow",
            "Principal": {
                "Federated": "arn:aws:iam::<ACCOUNT_ID>:oidc-provider/token.actions.githubusercontent.com"
            },
            "Action": "sts:AssumeRoleWithWebIdentity",
            "Condition": {
                "StringEquals": {
                    "token.actions.githubusercontent.com:aud": "sts.amazonaws.com"
                },
                "StringLike": {
                    "token.actions.githubusercontent.com:sub": "repo:<GITHUB_ORGANIZATION_NAME>/*"
                }
            }
        },
        {
            "Effect": "Allow",
            "Principal": {
                "AWS": "arn:aws:iam::<ACCOUNT_ID>:user/<IAM_USER_NAME>"
            },
            "Action": [
                "sts:AssumeRole",
                "sts:TagSession"
            ]
        }
    ]
}
Step 4: Attaching Policy to the IAM User
Assign a policy to the IAM user that permits ‘AssumeRole’ and ‘TagSession’ actions on the created IAM role.
					{
    "Version": "2012-10-17",
    "Statement": [
        {
            "Effect": "Allow",
            "Action": [
                "sts:AssumeRole",
                "sts:TagSession"
            ],
            "Resource": "arn:aws:iam::<ACCOUNT_ID>:role/<IAM_Role_NAME>"
        }
    ]
}
Step 5: Generating a Personal Access Token (PAT)
To generate a Personal Access Token (PAT) on GitHub, follow these steps:
- Go to the GitHub homepage and click on your profile photo in the top-right corner.
- From the dropdown, select “Settings.”
- On the left sidebar, choose “Developer Settings”.
- Next, click “Personal access tokens” from the left sidebar.
- Click “Generate new token”.
- Give your token a descriptive name in the “Note” field.
- Select the necessary scopes for your token. It is generally good practice to grant the least amount of access necessary to perform its intended function.
- Finally, click “Generate token” at the bottom of the page.
Once you click “Generate token”, GitHub will present the new token value. Make sure to copy this value as GitHub will not show it again.
Step 6: Safeguarding Secrets in GitHub Repository
To uphold a high level of security, sensitive information like GitHub PAT(Personal Access Token), AWS Access Key ID, and AWS Secret Access Key should never be hard-coded in the workflow file. Instead, add these as secrets within your GitHub repository. The workflow file can reference these secrets as needed. Here’s how to do this:
- Navigate to your GitHub repository.
- Click on the “Settings” tab.
- From the left sidebar, select “Secrets and variables”
- Then click “New repository secret”.
- You will be prompted to enter a name for the secret and the secret’s value. For the name, you might use something like GH_PAT, and the value will be the token you generated in the previous step.
- After entering the required information, click “Add secret” to save it.
- Repeat the same step for adding AWS_ACCESS_KEY_ID and AWS_SECRET_ACCESS_KEY
Now, your secrets are securely stored in the GitHub repository and can be referenced within GitHub Actions workflows using the secrets context. The secrets are encrypted and can only be accessed by GitHub Actions running in the same repository, ensuring the security of your sensitive data.
Importantly, these secrets are not passed to workflows initiated by a pull request from a fork, adding another layer of security against unauthorized access.
Step 7: Setting up GitHub Workflow
Navigate to the ‘.github/Workflows’ directory within your GitHub repository. Here, a new file named ‘pull-request-merged.yml’ needs to be created. This file will dictate the workflow that is triggered upon a pull request merge on a specific branch. In this workflow, AWS credentials will be configured, and the AWS CodePipeline will be initiated.
					name: pull-request-merged
on:
  pull_request:
    types: [closed]

env:
  GH_PAT: ${{ secrets.GH_PAT }}
  GH_TOKEN: ${{ secrets.GITHUB_TOKEN }}

jobs:
  merged:
    if: github.event.pull_request.merged == true
    runs-on: ubuntu-latest
    steps:
      - name: PR merged
        run: echo "This PR was merged into ${{ github.event.pull_request.base.ref }}"
      - name: Configure AWS credentials
        uses: aws-actions/configure-aws-credentials@v1
        with:
          aws-access-key-id: ${{ secrets.AWS_ACCESS_KEY_ID }}
          aws-secret-access-key: ${{ secrets.AWS_SECRET_ACCESS_KEY }}
          aws-region: ap-southeast-1
          role-to-assume: "arn:aws:iam::<ACCOUNT_ID>:role/<IAM_Role_NAME>"
          role-duration-seconds: 900
      - name: Run AWS Pipeline
        run: |
          echo "Triggering AWS Pipeline"
          if [[ "${{ github.event.pull_request.base.ref }}" == "dev" ]]; then
            aws codepipeline start-pipeline-execution --name Backend-Dev
            aws codepipeline start-pipeline-execution --name Backend-QA
          fi
          if [[ "${{ github.event.pull_request.base.ref }}" == "staging" ]]; then
            aws codepipeline start-pipeline-execution --name Backend-Staging
          fi
The on attribute specifies the event that will trigger the workflow. In our case, this workflow is triggered when a pull request is closed (types: [closed]).
The env section declares environment variables. We’ve defined two variables: GH_PAT and GH_TOKEN, which are assigned the values of the corresponding secrets stored in the repository.
In the jobs section, we define a job named merged. This job will run only if the pull request has been merged (github.event.pull_request.merged == true). The job runs on the latest Ubuntu runner (runs-on: ubuntu-latest).
The Steps:
Each job comprises several steps. In our case, there are three steps:
- PR Merged: This step outputs a statement indicating that the pull request has been merged into a specific branch.
- Configure AWS Credentials: This step configures the AWS credentials using the aws-actions/configure-aws-credentials action. It uses the secrets defined as environment variables to set the AWS access key, secret access key, and IAM role to be assumed.
- Run AWS Pipeline: This step runs the AWS CodePipeline depending on the branch into which the pull request has been merged. If the pull request was merged into the ‘dev’ branch, the ‘Backend-Dev’ and ‘Backend-QA’ pipelines are triggered. If it was merged into the ‘staging’ branch, the ‘Backend-Staging’ pipeline is triggered.
Step 8: Verifying the Workflow
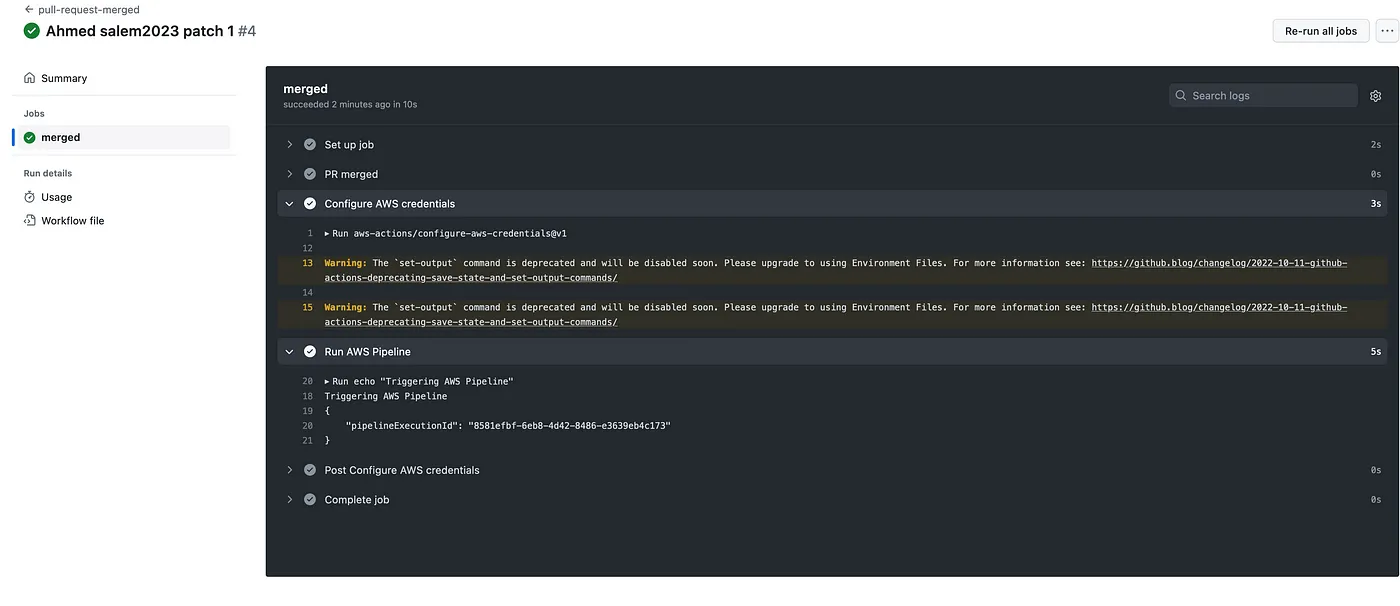
To test our workflow, create and merge a pull request into either the ‘staging’ or ‘develop’ branch. If configured correctly, the corresponding AWS CodePipeline will be triggered as intended.
To observe this in action, follow these steps:
- After you’ve merged the pull request, navigate to your GitHub repository page.
- Locate and click on the ‘Actions’ tab. This tab is where all the magic happens: it provides a visual representation of your workflows, their state (whether they’re running, completed, or have resulted in an error), and details about each run.
- Within the ‘Actions’ tab, you will find a list of workflows. Click on the ‘pull-request-merged’ workflow (or the title you’ve assigned for this workflow). You should be able to see a new run listed as a result of your recent pull request merge.
- By clicking on this run, you can watch the job execution in real-time and track each step. If the workflow operates successfully, you will see green check marks next to each step. However, if something goes awry, you’ll notice red crosses indicating an error.
- To debug any errors, click on the step that failed. Here, you will see a log output that can help you understand what went wrong. This detailed log can provide valuable information for troubleshooting and resolving any issues.
This process allows you to visualize, track, and debug your workflows, thereby ensuring seamless integration and deployment, and fostering a robust CI/CD process.
Conclusion
By effectively integrating GitHub Actions with AWS CodePipeline, you can significantly automate your deployment process, ensuring your application remains synchronized with the latest changes. Keep in mind that a productive CI/CD setup isn’t a one-size-fits-all solution. Gaining a thorough understanding of the underlying principles and customizations to suit your specific requirements is vital.
Happy coding, and may your pipelines flow smoothly!
Ahmed Salem
Ahmed Salem
Start the Conversation Today
Let's Talk

